搭建自己的博客
工具和环境
- Golang
- Hugo
- Github
- Netlify
- 域名
配置
1. go安装
golang的官网下载go,根据自己的平台安装.
2. Hugo 安装
GitHub上面下载自己平台的安装即可
Mac 平台用 brew
brew install hugo
3.用Hugo配置博客
hugo new site blog
生成的目录文件大致如下
.
├── archetypes
│   └── default.md
├── config.toml # 配置文件入口
├── content # Markdown 文件存放入口
├── data
├── layouts # 网站页面结构管理入口
├── static # 网站静态资源存放入口
└── themes # 网站主题皮肤入口
配置hugo的主题模板 在Hugo官网 已经给出很多模板,选一款自己喜欢的,然后下载解压到 themes 文件夹
copy 主题的配置
cp themes/npq-hugo/config.toml .
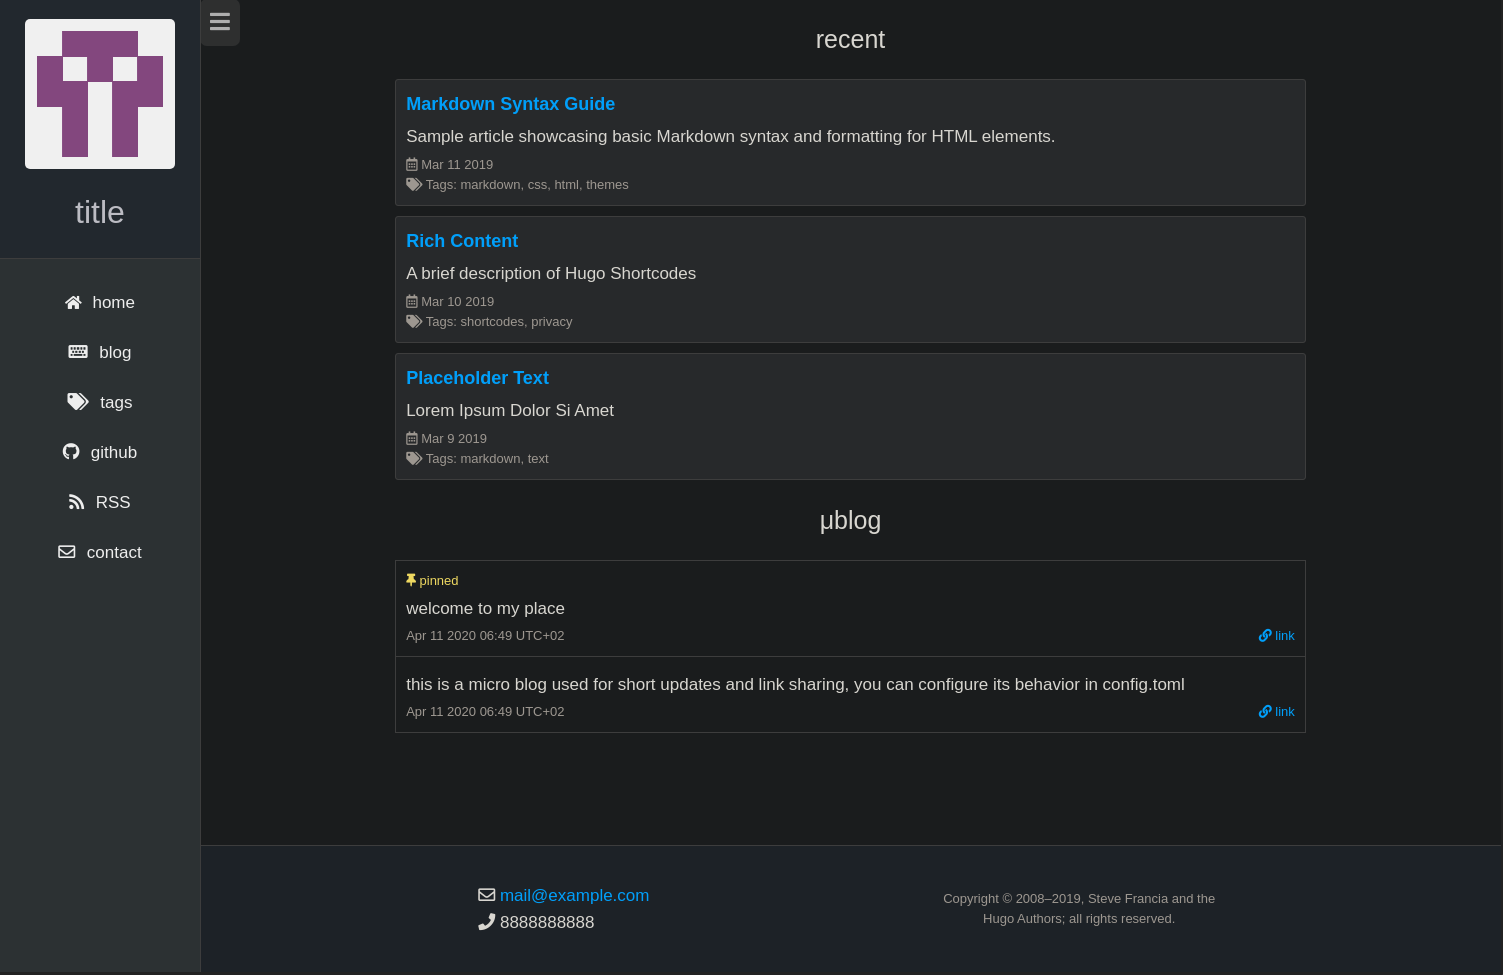
我使用的是npq hugo 你看到的会和下面一样,然后自己修改配置
baseURL = "https://www.example.com"
languageCode = "en-us"
title = "title"
copyright = "Copyright © 2008–2019, Steve Francia and the Hugo Authors; all rights reserved."
theme = "npq-hugo"
pygmentsUseClasses=true

[params]
  author = "your name"
  description = "your description"
  keywords = "hugo blog"
  useAvatar = true
  microBlogSection = "posts"
  displayMicroBlog = false
  displayRecent = true
  recentMax = 4
  mail = "mail@example.com"
  phone = "8888888888"
  formspreeID = "yourformspreeID"

[menu]
  [[menu.main]]
    name = "home"
    pre = "<i class=\"fas fa-home fa-sm\"></i>"
    url = "/"
    weight = -9
  [[menu.main]]
    name = "blog"
    pre = "<i class=\"fas fa-keyboard fa-ms\"></i>"
    url = "/blog/"
    weight = -8
  [[menu.main]]
    name = "tags"
    pre = "<i class=\"fas fa-tags fa-ms\"></i>"
    url = "/tags"
    weight = -7
  [[menu.main]]
    name = "github"
    pre = "<i class=\"fab fa-github fa-ms\"></i>"
    url = "https://github.com/yourgithubusername23434"
    weight = -6
  [[menu.main]]
    name = "RSS"
    pre = "<i class=\"fas fa-rss fa-ms\"></i>"
    url = "/index.xml"
    weight = -4
  [[menu.main]]
    name = "contact"
    pre = "<i class=\"far fa-envelope\"></i>"
    url = "/contact"
    weight = -1
最后run 看看效果
hugo server -D
使用GitHub存储博客
GitHub广大的程序猿的爱好网站之一,首先创建一个自己的仓库然后把本地的代码上传.
git init
git add .
git commit -m "first"

git remote add origin <替换自己的git仓库>
git push -u origin master

Netlify部署博客
先去官网注册一个账户,然后关联我们的git仓库


Deploy site 之后,部署成功就能看到的网站为我们的生成的访问链接

然后我们就可以访问的自己的博客
在部署的时候有个坑
可能会再存 错误代码255 编译问题,这需要修改编译配置 netlify.toml
[build]
  command = "hugo --gc --minify -b $URL"
  publish = "public"

[build.environment]
  HUGO_VERSION = "0.69.2"
  HUGO_ENABLEGITINFO = "true"

[context.production.environment]
  HUGO_ENV = "production"

[context.deploy-preview]
  command = "hugo --gc --minify --buildFuture -b $DEPLOY_PRIME_URL"

[context.branch-deploy]
  command = "hugo --gc --minify -b $DEPLOY_PRIME_URL"

[[headers]]
  for = "*.webmanifest"
  [headers.values]
    Content-Type = "application/manifest+json; charset=UTF-8"

[[headers]]
  for = "index.xml"
  [headers.values]
    Content-Type = "application/rss+xml"
配置域名
用自己的域名服务商配置域名解析
以阿里云为例
我们新增一条CNAME 解析,等几分钟生效就就可以访问了

最后开启https访问,在项目的设置开 Netlify 为我们提供的配置

图片
这个有很多解决方案,国内用七牛云,但是我的域名没有备案用不了,索性找到一个使用GitHub的方案
在项目的issues 里面可以上传图片,然后在Markdown 使用
Google Analytics
配置 GA流量监控

配置自己的博客地址,然后会给出配置信息

复制我们的代码到
/themes/npq-hugo/layouts/_default/baseof.html
写博客
写一篇文章
hugo new post/test.md
然后会再 content目录下面生成文件,刷新浏览器界面就能看到

基本上就这些了,其他的后续补上
文章参考
https://www.bmpi.dev/dev/guide-to-setup-blog-site-with-zero-cost-1/